At the end you have one page, designed from your app’s own screens, in App Store Connect and submitted for Apple’s review. It takes about fifteen minutes, most of it waiting while the page is built. Every step on this path works on a new account with the free plan.
Before you start
- An app on the App Store. The free preview looks it up on the US App Store by name.
- An email address you work from. Throwaway inboxes are refused.
- Access to your team in App Store Connect, to create an API key and to submit a page for review.
1. Look up your app
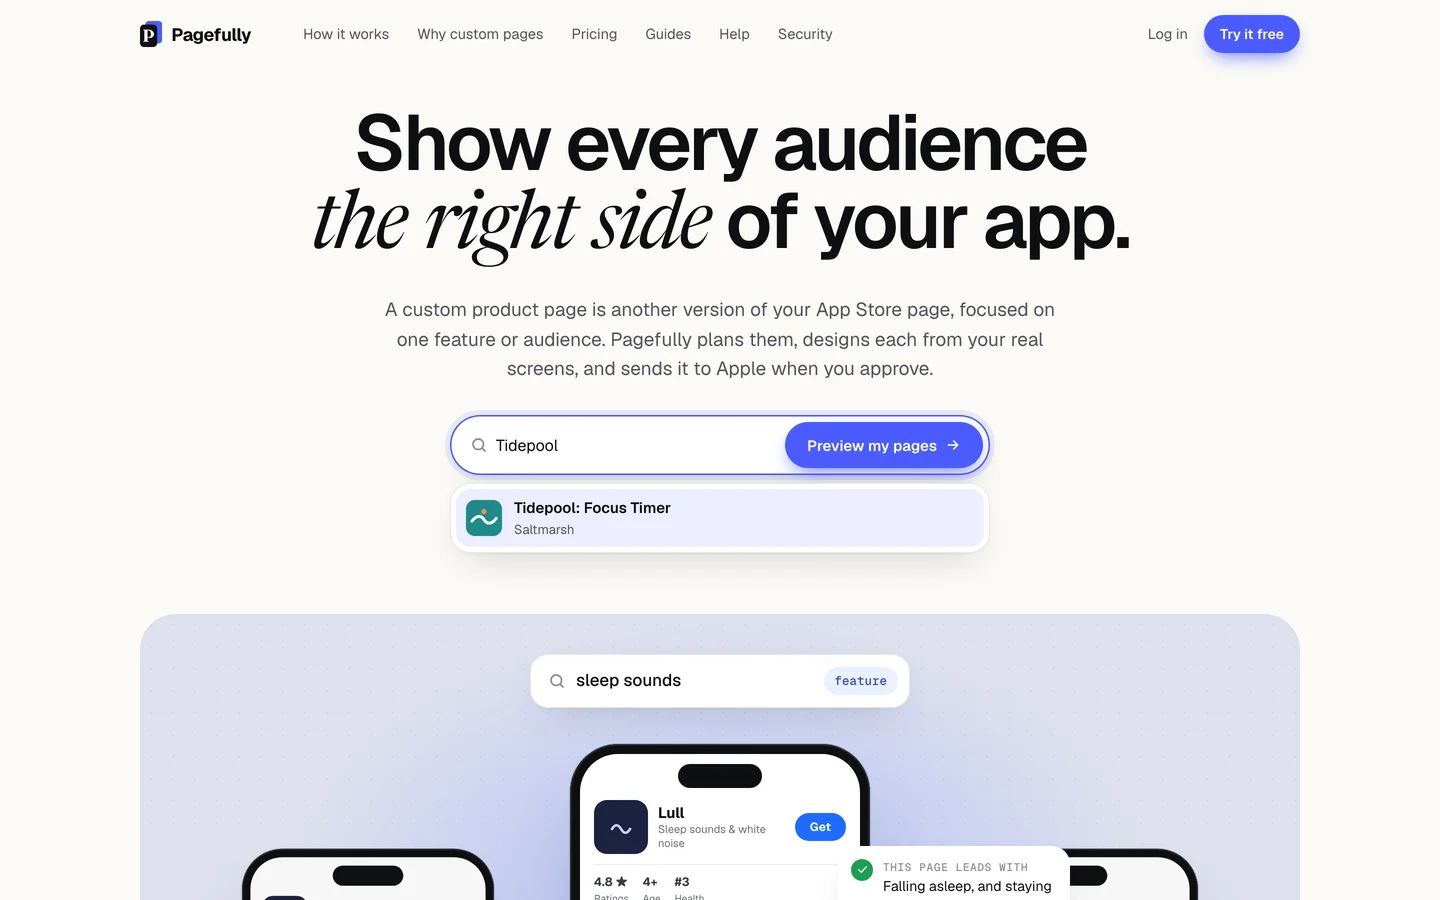
- On pagefully.com, in the field Search for your iOS app, type your app’s name.The list appears as you type. Pasting your App Store link works too.
- Click your app in the list Apps on the App Store.
- Wait while the preview is made: Read your listing, Understand your app, Plan your pages, Write headlines, Design screenshots.Most apps take under a minute. Nothing is asked of you first: no email, no key.
- Click Get this page free, then add more.
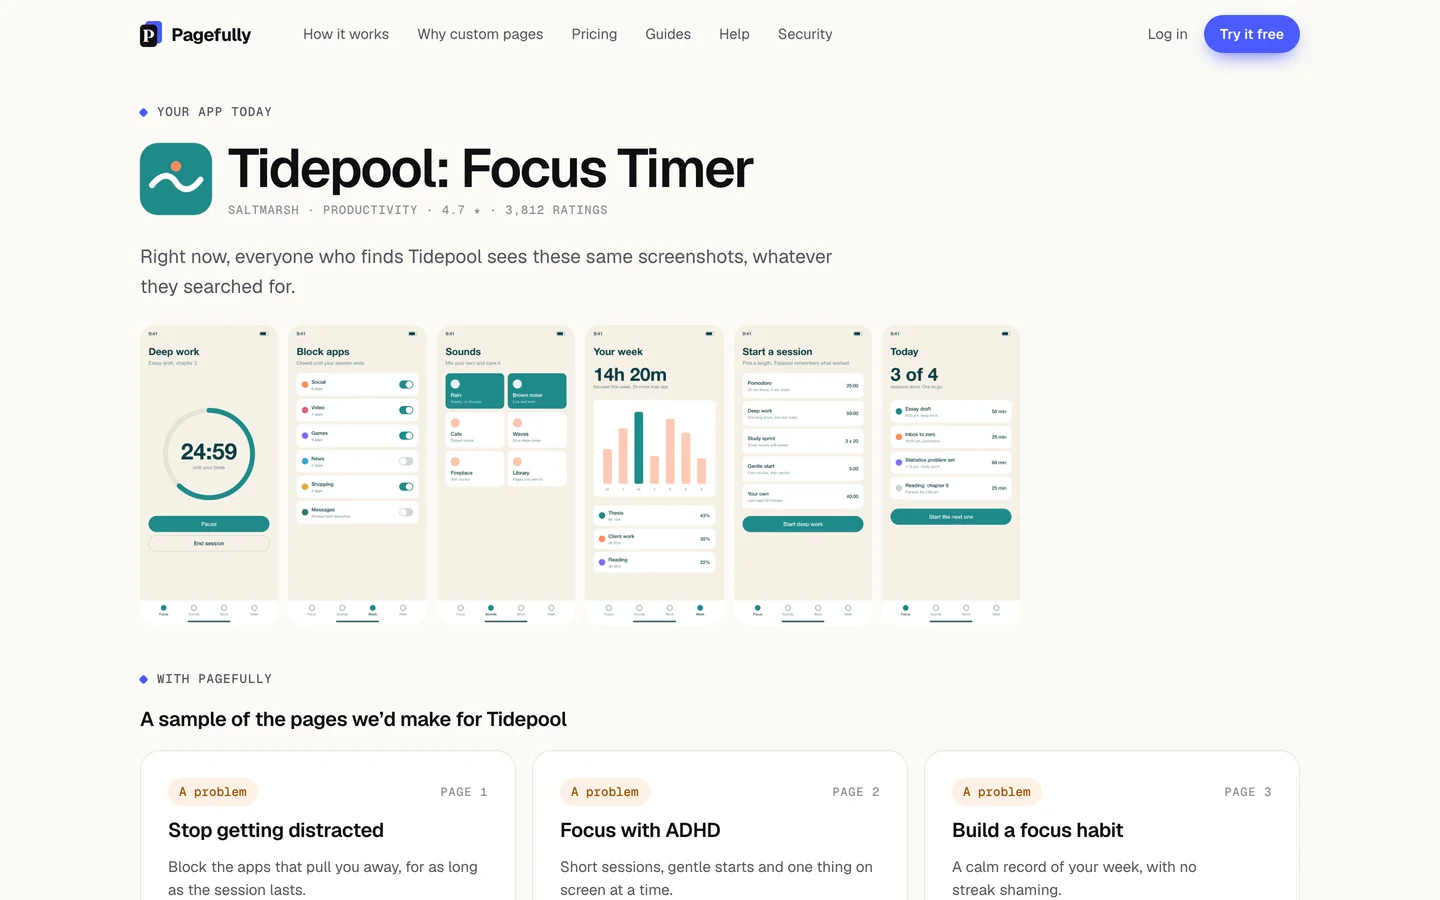
You should now see the sign-up form, Create your account, with the line “Your app and the page we designed come with you.”
2. Create your account
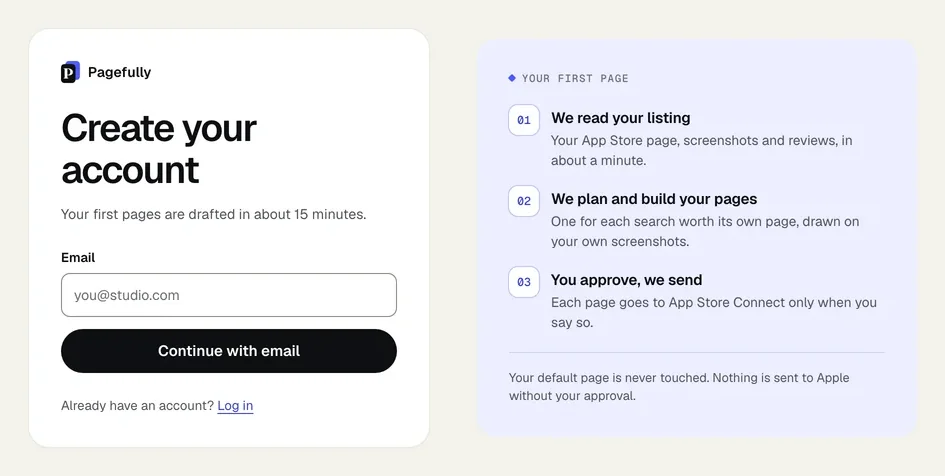
- In Email, type the address you work from.
- Click Continue with email.The form changes to Check your inbox. with the address you typed. The link expires in an hour.
- Open the email “Confirm your email to start with Pagefully” and click Confirm and continue.There is no password. Each time you sign in, you ask for a link like this one.
You should now see your app’s Listing screen, with Reading and your app’s name while your public App Store page is read. It takes under a minute.
3. Connect App Store Connect
The key lets Pagefully read your keyword field and send a page to App Store Connect. Connect App Store Connect has every detail and every error; these are the steps.
- On Listing, in the right-hand panel, click Connect App Store Connect.The panel is headed Your public App Store page, and Connecting adds lists what the key brings.
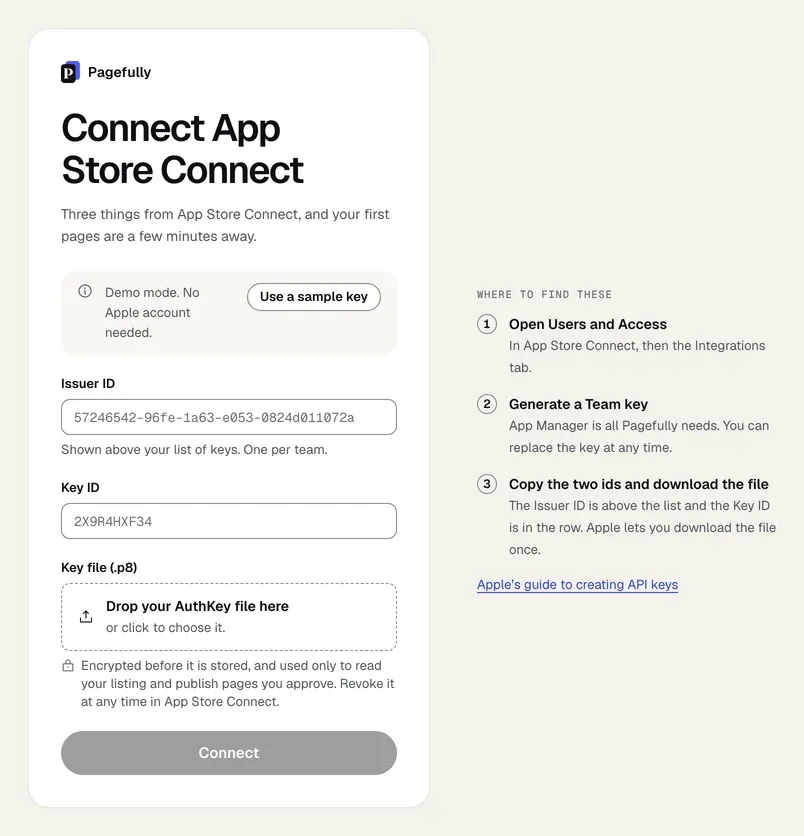
- In App Store Connect, open Users and Access, then the Integrations tab.
- Generate a Team key with the App Manager role.App Manager is all Pagefully needs. You can replace the key at any time.
- Copy the Issuer ID and the Key ID, and download the key file.The Issuer ID is above the list of keys and the Key ID is in the row. Apple lets you download the file once.
- In Pagefully, paste the Issuer ID and the Key ID, and drop the file on Drop your AuthKey file here.Dropping the file fills in the Key ID from its name.
- Click Connect.You see Connecting while the key is checked with Apple.
- On Choose an app, click your app.A team with one app skips this screen. The app you added by name is kept, with everything made for it.
You should now see Listing reading your app again, this time with your Keyword field in the right-hand panel.
4. Approve your listing
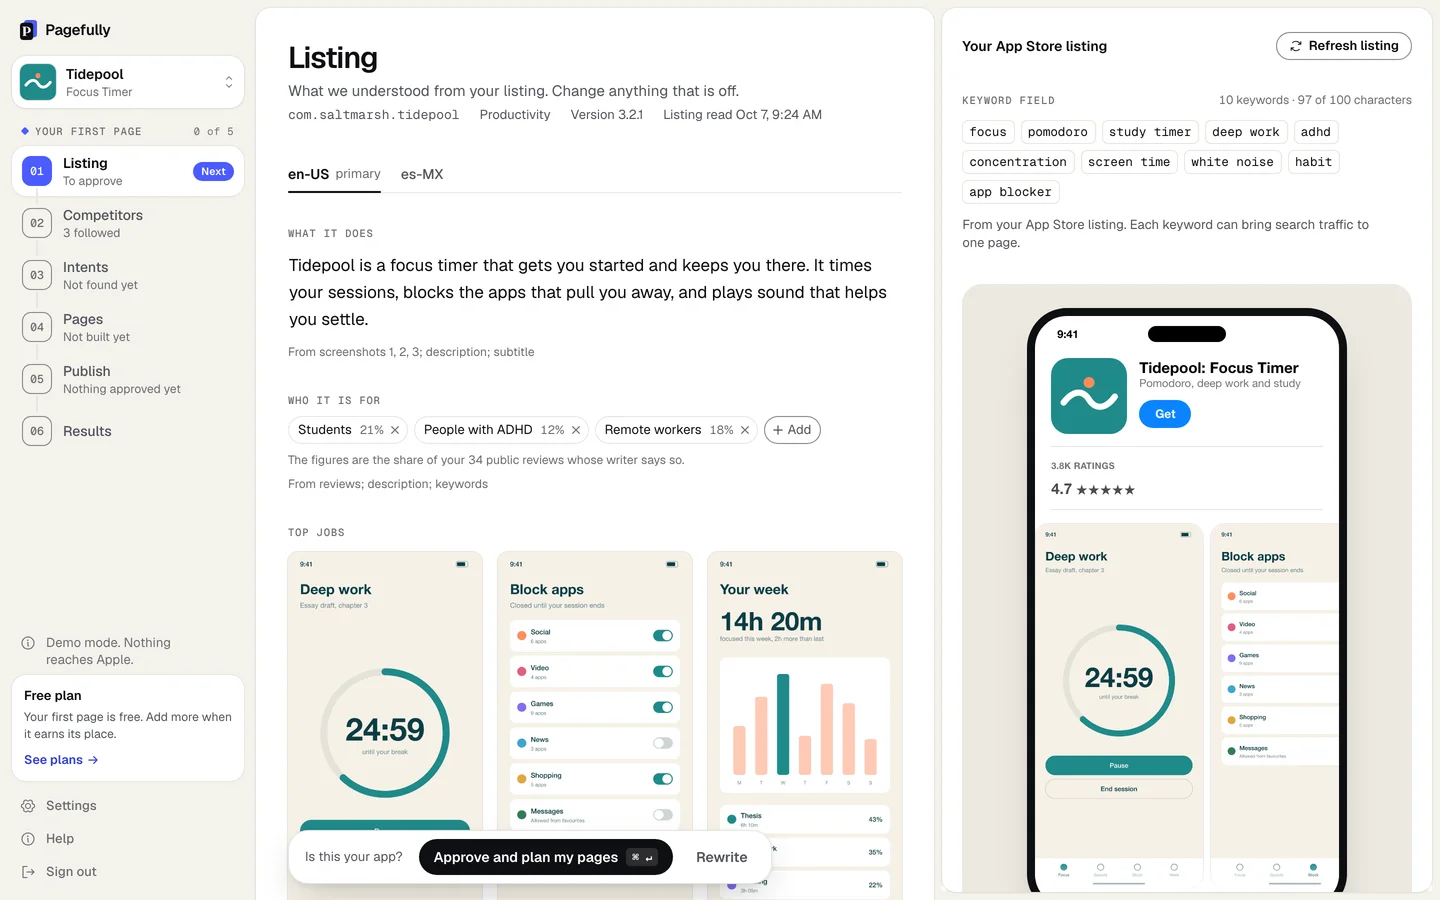
- On Listing, read What it does and Who it is for, and change anything that is off.Your pages are planned from this, so a wrong word here becomes a wrong page.
- In the bar Is this your app?, click Approve and plan my pages.If the button reads Approve, go to Intents, the pages from your preview are already planned. Click it.
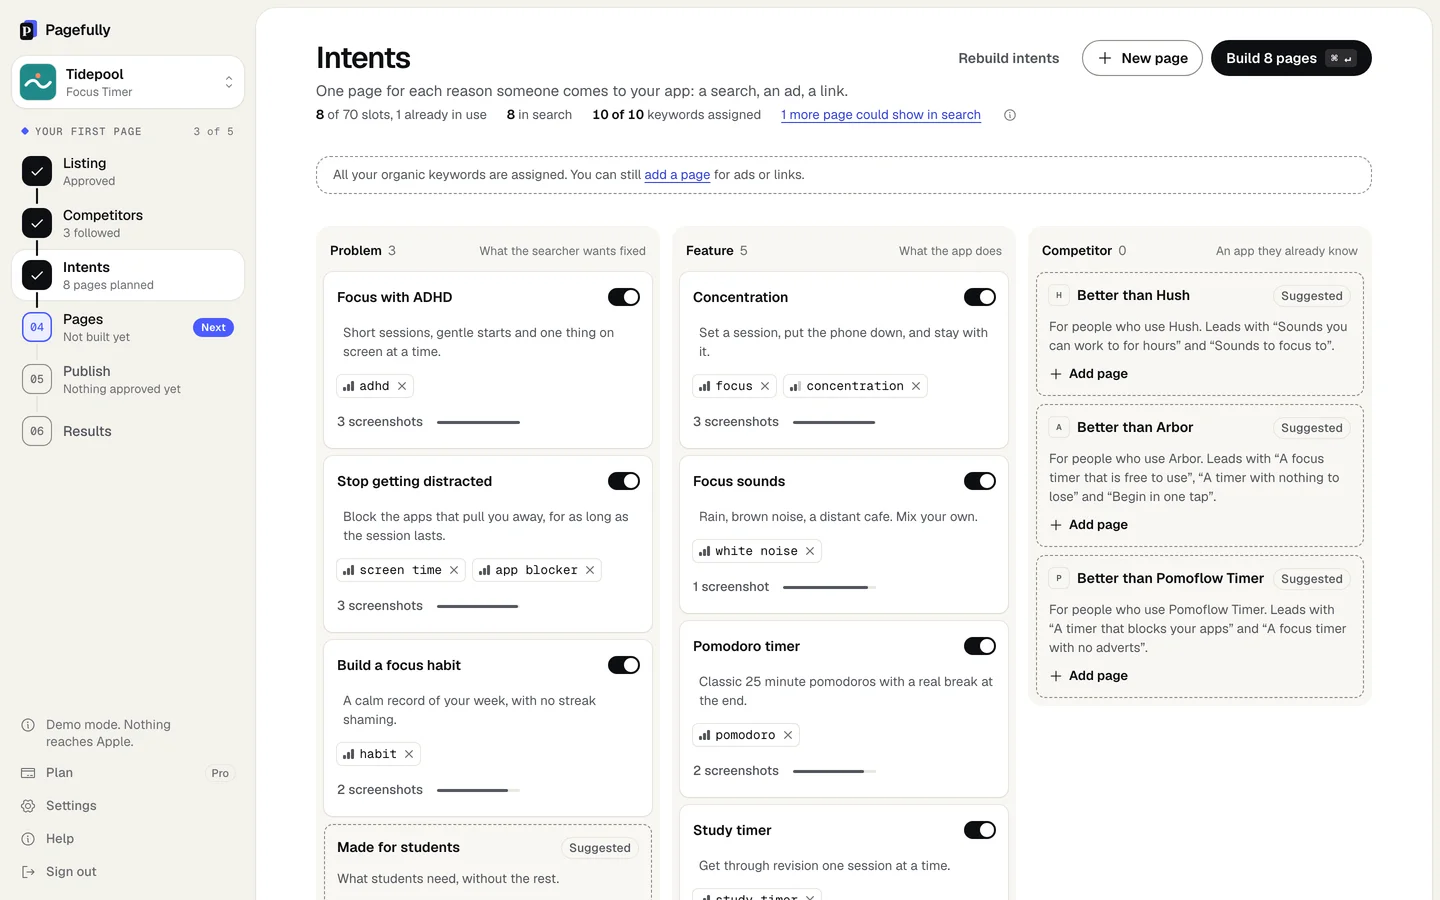
You should now see Intents. The first time it says Finding your search intents for about a minute, then the three columns Problem, Feature and Competitor fill with pages.
5. Plan and build pages
Free makes one page. On Pages the first switched-on page is the one built, so choose it on Intents first.
- On Intents, look over the pages planned for your app. Switch off any you do not want first.Each card is one page: its name, what it says, and the keywords it shows for. The switch is on the card.
- In the sidebar, click Pages.
- Click Build 1 page.About a minute. The page appears when it is drawn, with the status Ready. If the page from your preview is already here, it is drawn again by itself: wait for Ready.
- Click the page to open it, and look at each screenshot on iPhone 6.9", iPhone 6.5" and iPad 13".Change a headline with Edit words if you want. Checks at the foot shows what was read against App Review’s rules.
- Click Approve page.If asked about screenshots that still show your own words, click Approve anyway. You can change them later.
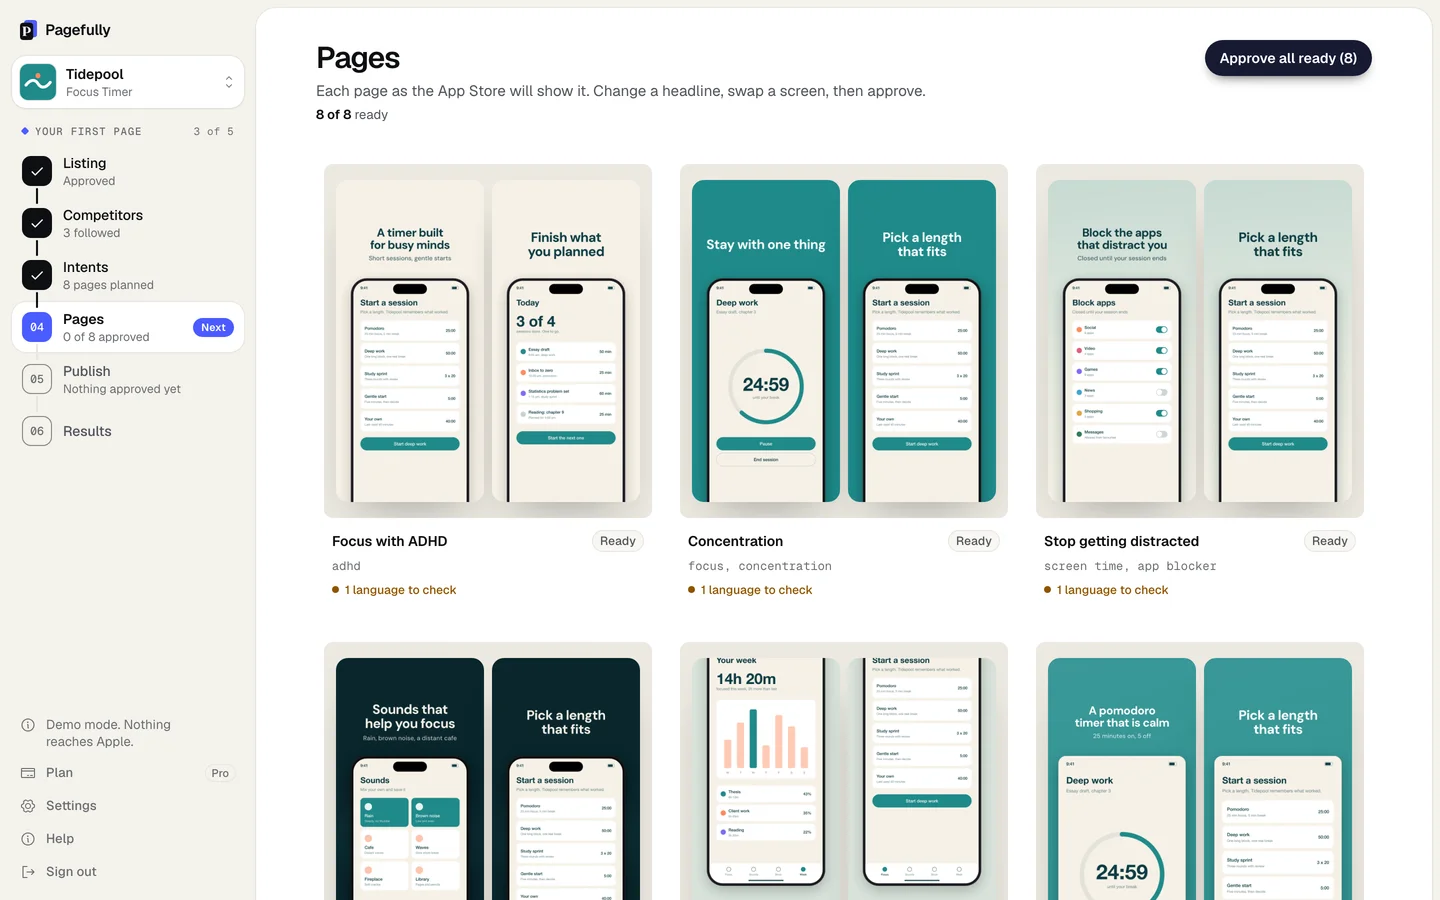
You should now see the pill Approved and the notice Approved. Choose Edit to change it, then approve again. with the button Go to Publish.
6. Send it
- Click Go to Publish.The approved page is already chosen, under Will be sent 1.
- Click Send 1 page to App Store Connect.
- In the sheet Send 1 page to App Store Connect?, read what will change, then click Send to App Store Connect.The sheet lists the screenshots and promotional text that go, and says the page is not submitted for review.
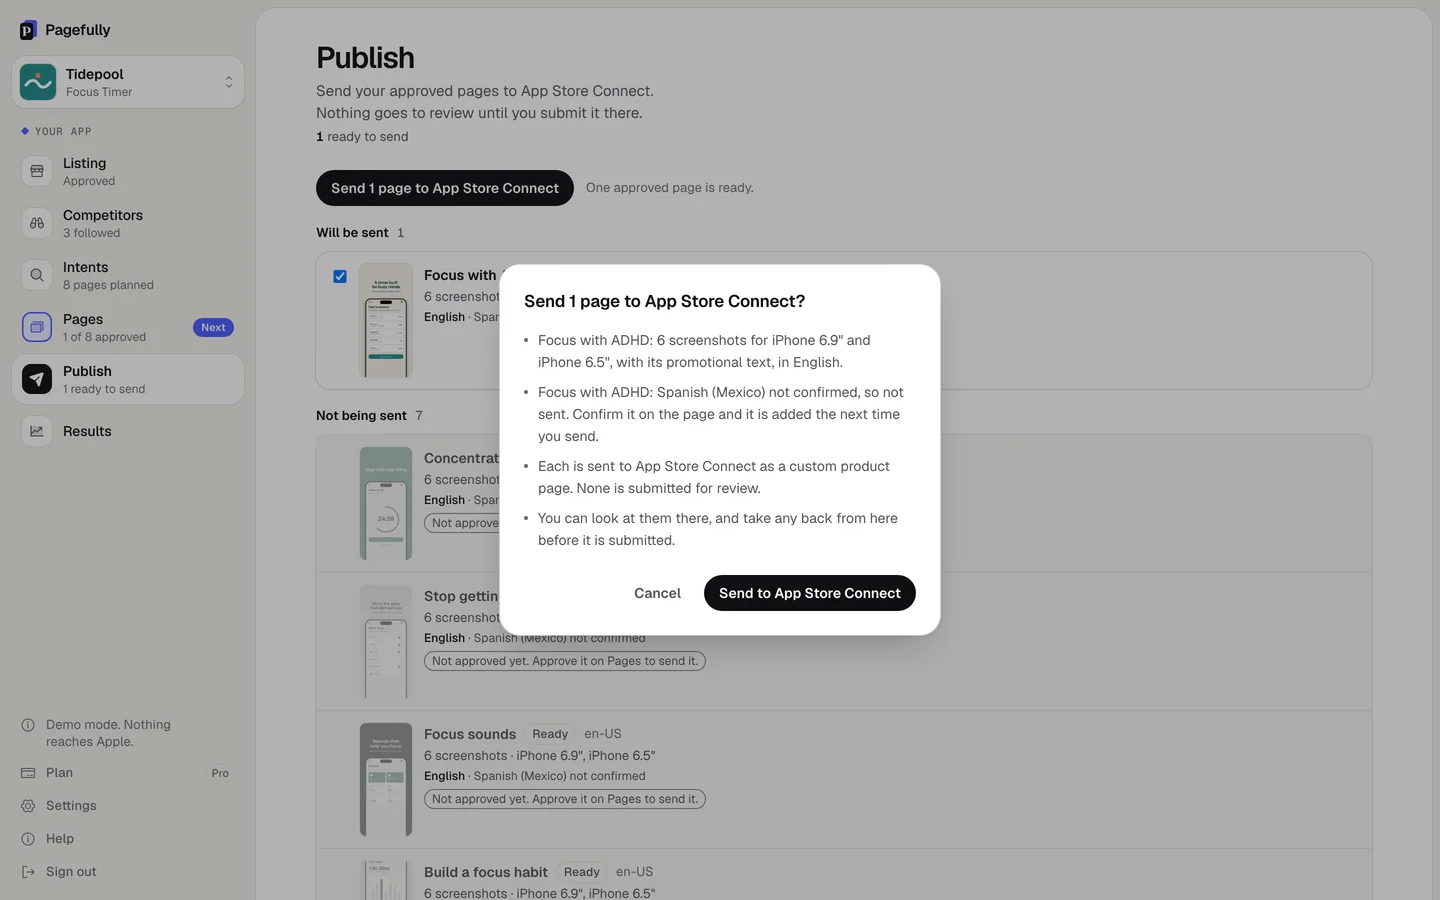
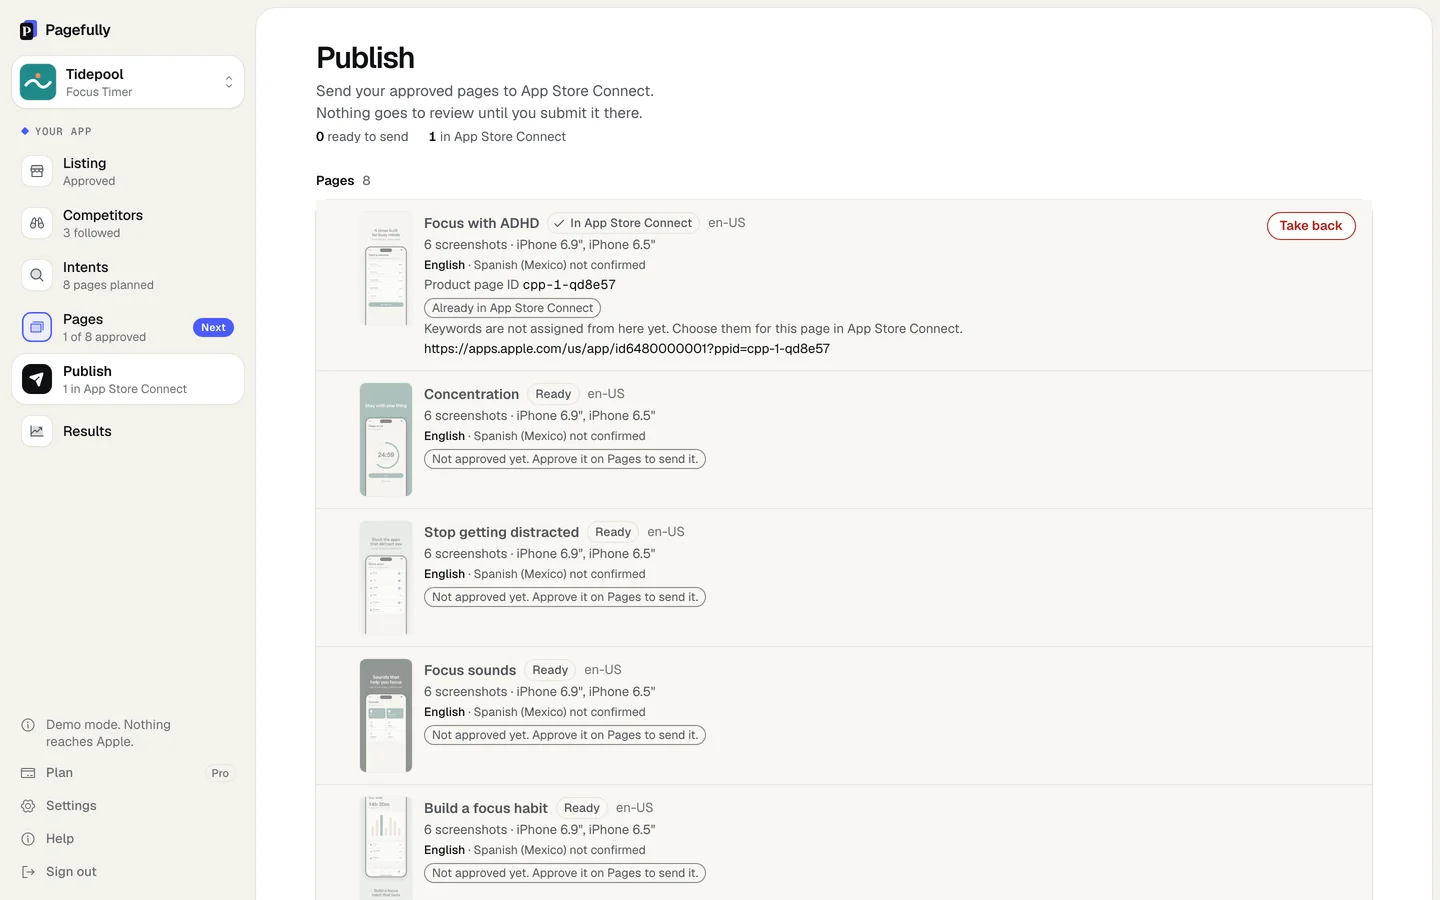
You should now see the pill Sending with its steps, then In App Store Connect with the page’s Product page ID. The page is in App Store Connect, not yet submitted.
7. Submit it for review in App Store Connect
Pagefully does not do this step. A page reaches Apple’s review only when you submit it in App Store Connect.
- Open App Store Connect, click Apps, and select your app.
- In the left sidebar, click Custom Product Pages.
- Open the page. It has the name it had in Pagefully.Its screenshots and promotional text are already there.
- Click Add for Review, then Submit for Review.If your app has no approved version yet, add the page to your first version’s submission instead.
In App Store Connect the page’s status reads Waiting for Review, then In Review. That’s it: your first custom product page is with Apple. Keywords are chosen for the page in App Store Connect, not in Pagefully.
What to do next
- Assign keywords to the page in App Store Connect, so it shows in search.
- Plan your pages on the Intents screen: add a page, dismiss a suggestion, move a keyword.
- Plans explained: the Pack for ten pages, or Pro to keep every page current.